- Functions
Allgemeine Features
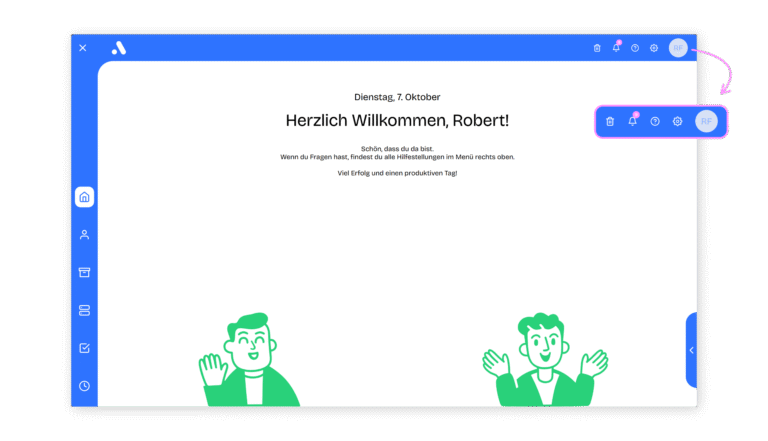
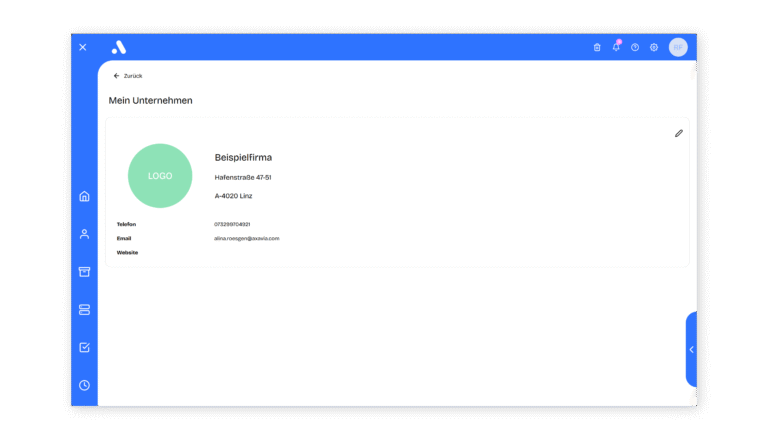
Nutze das Dashboard, Collaboration Features oder BenachrichtigungenAllgemeine Features
Nutze das Dashboard, Collaboration Features oder BenachrichtigungenLearn moreAddress management
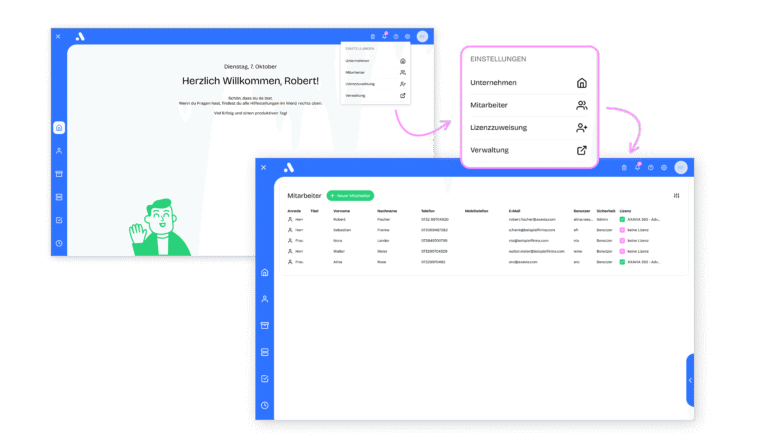
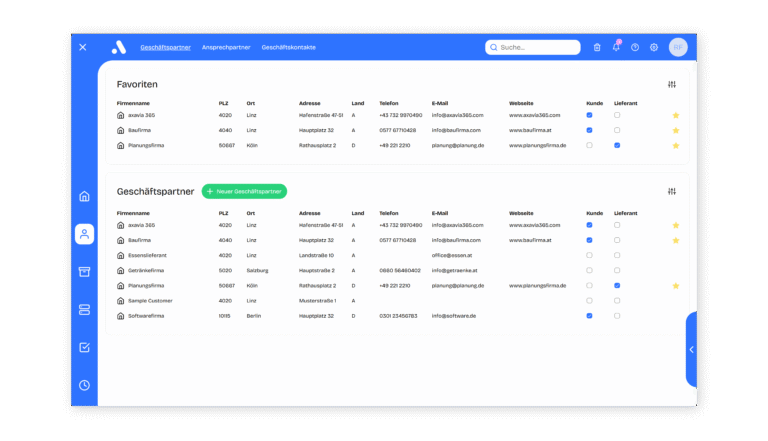
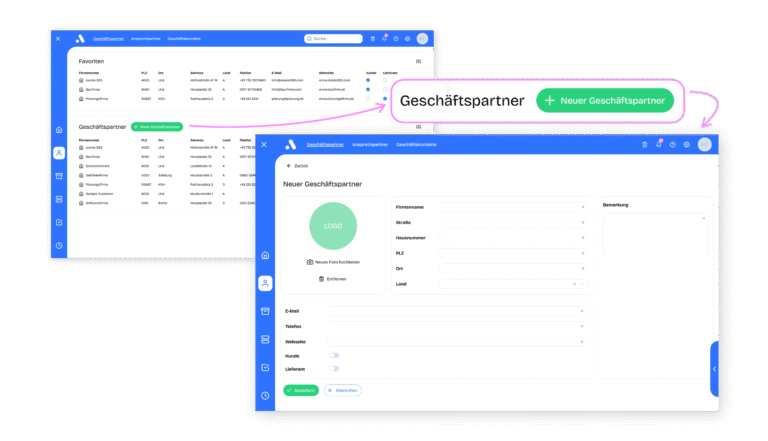
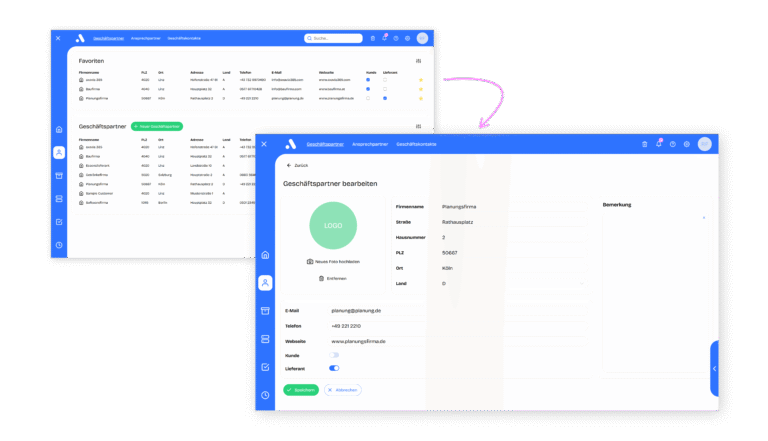
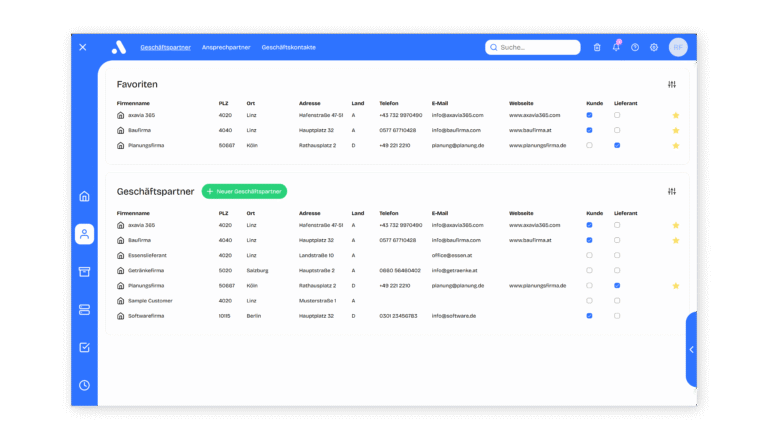
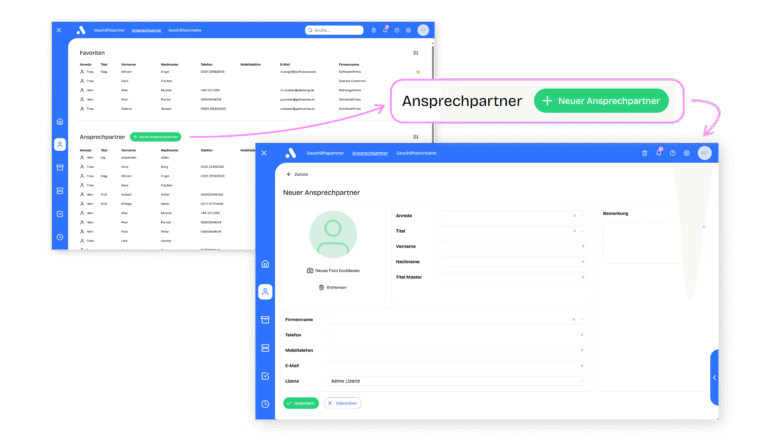
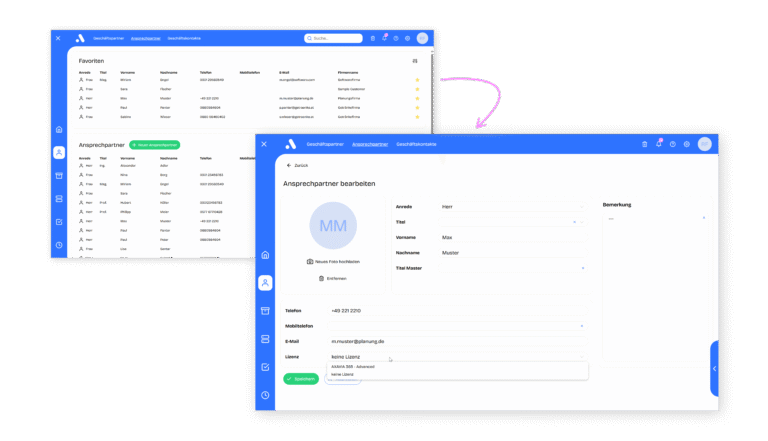
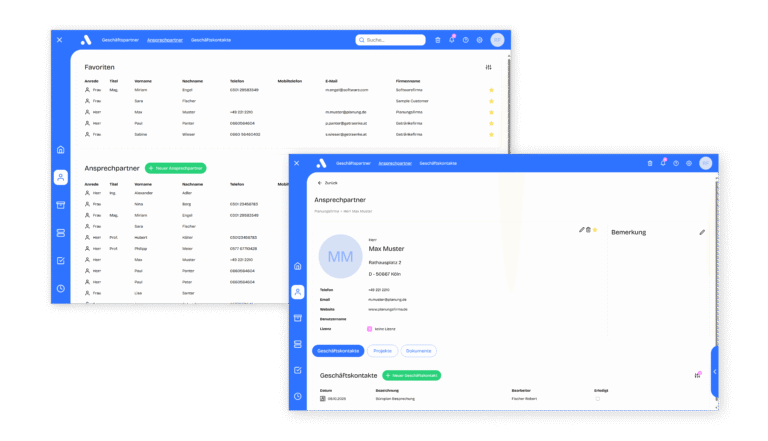
Keep track of all your business partners' contact detailsAddress management
Keep track of all your business partners' contact detailsLearn moreProject management
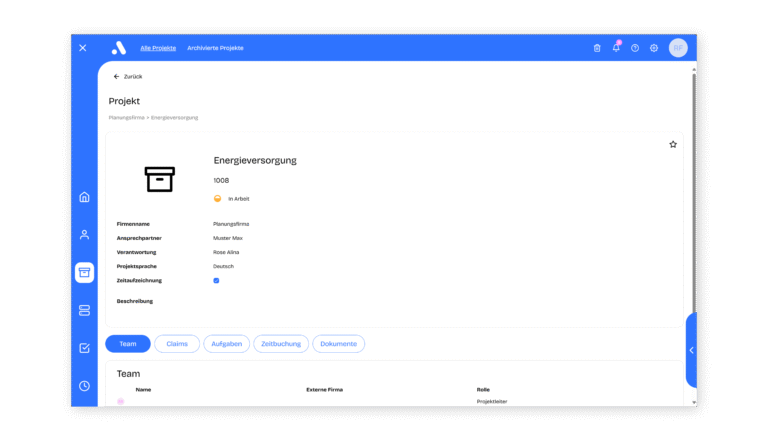
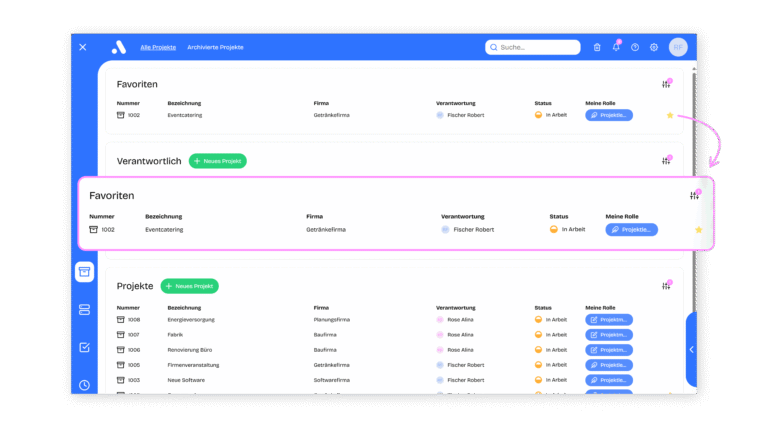
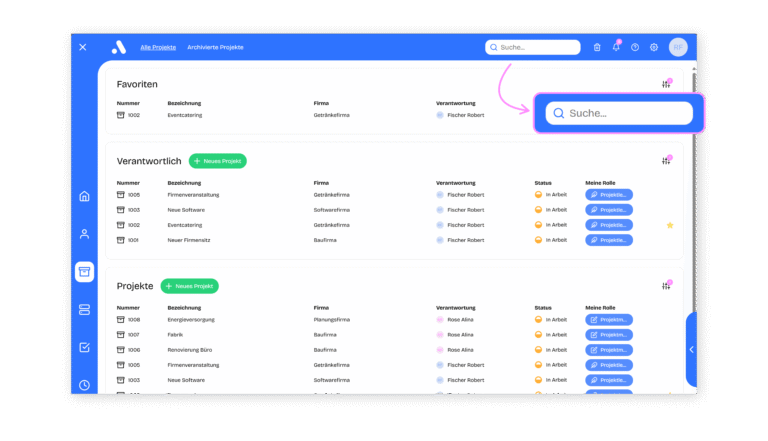
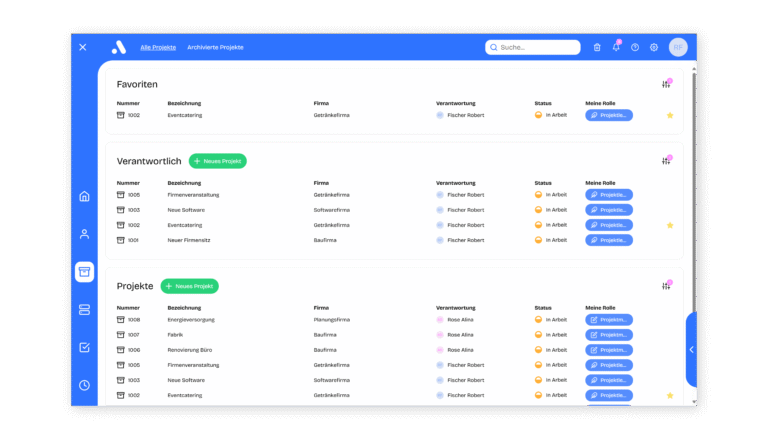
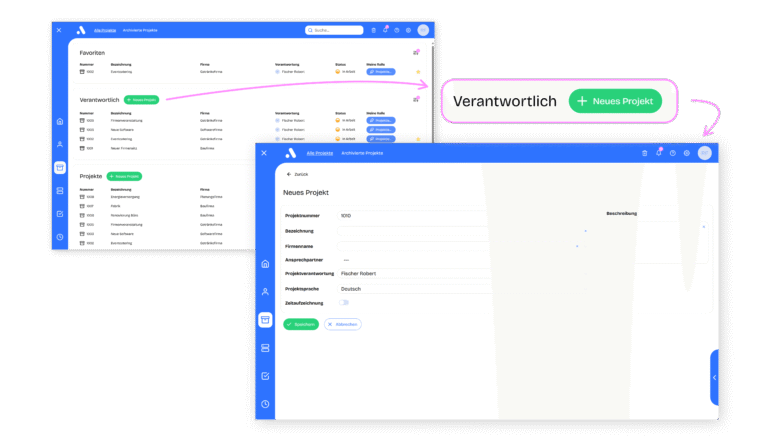
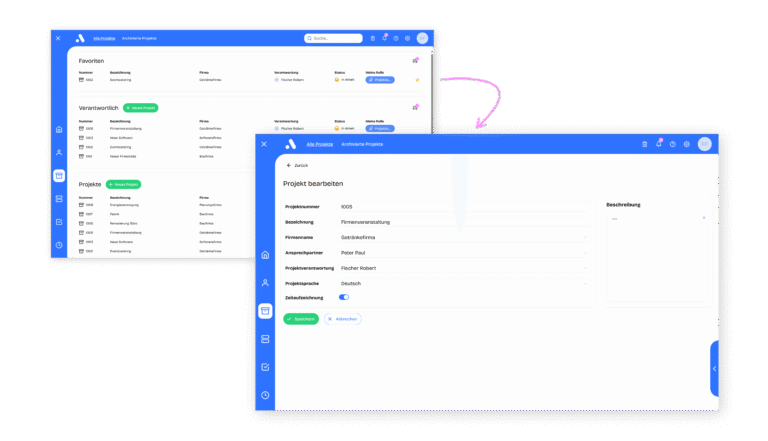
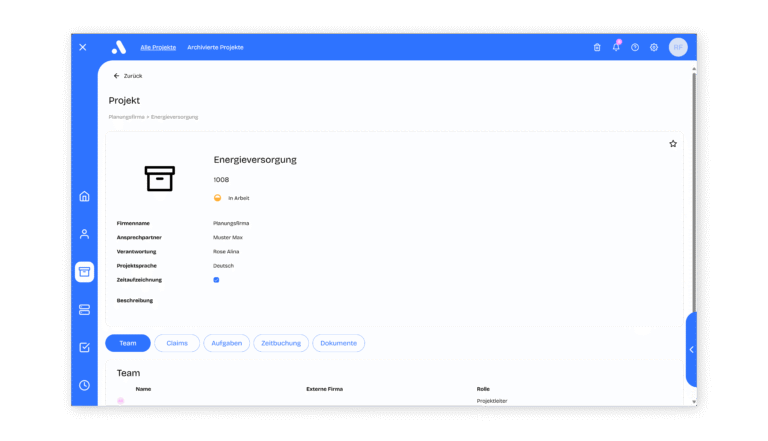
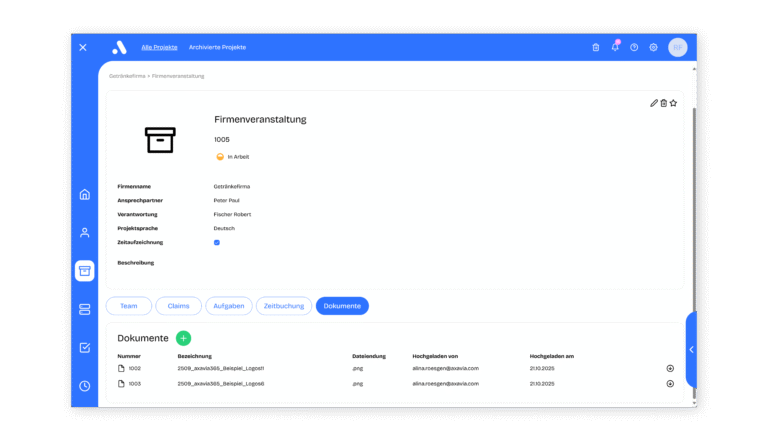
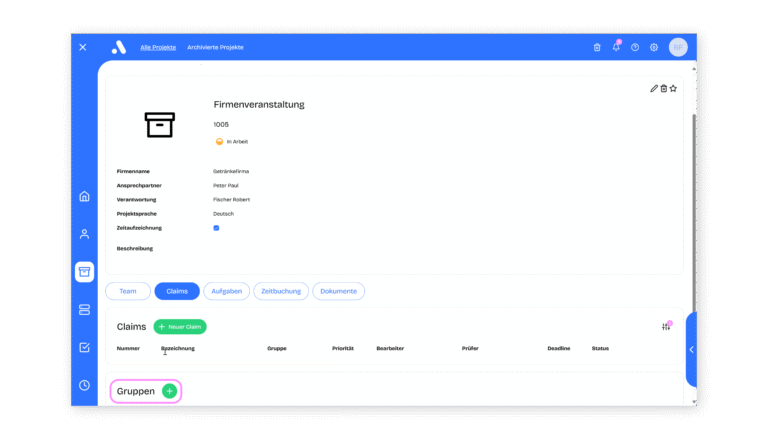
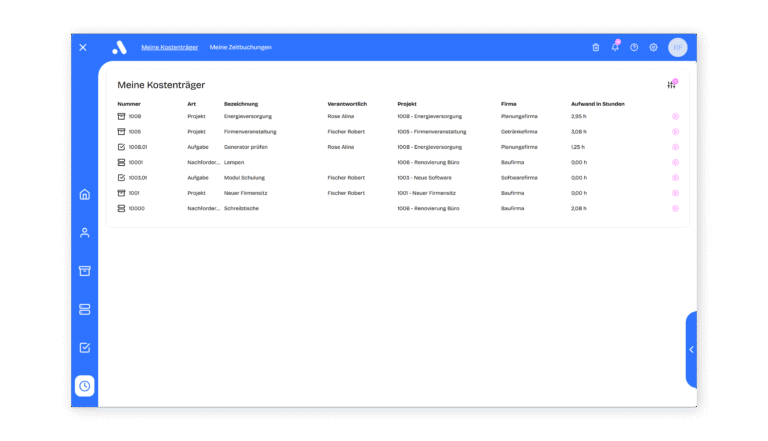
Manage deine Projekte effizient gemeinsam mit deinem ProjektteamProject management
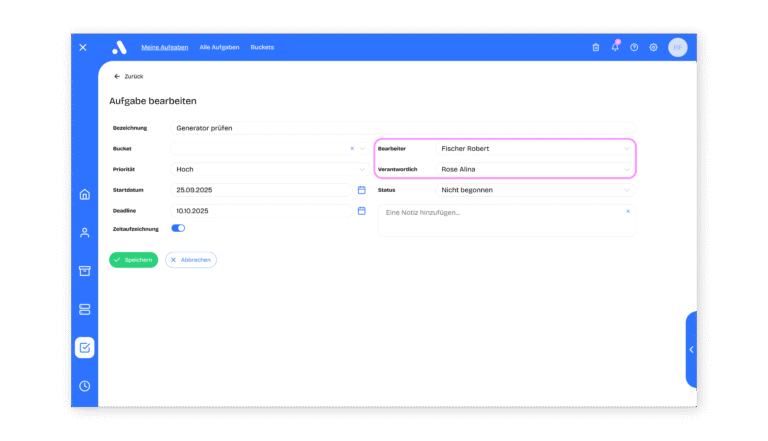
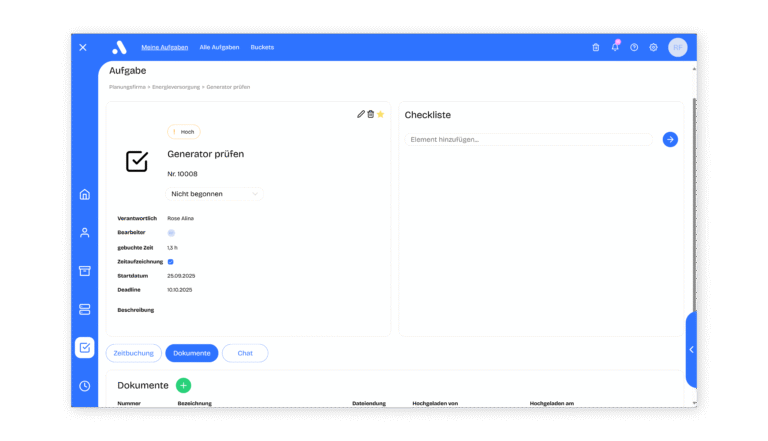
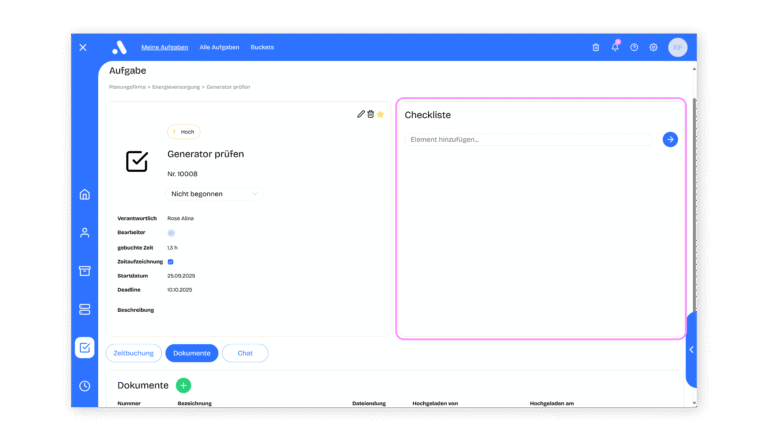
Manage deine Projekte effizient gemeinsam mit deinem ProjektteamLearn moreAufgabenplanung
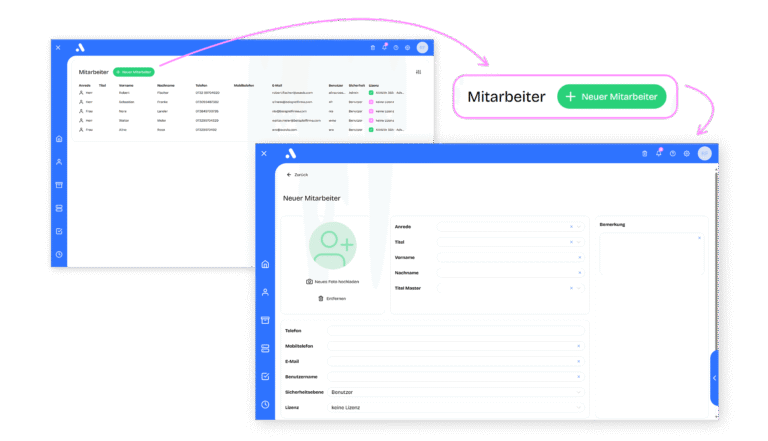
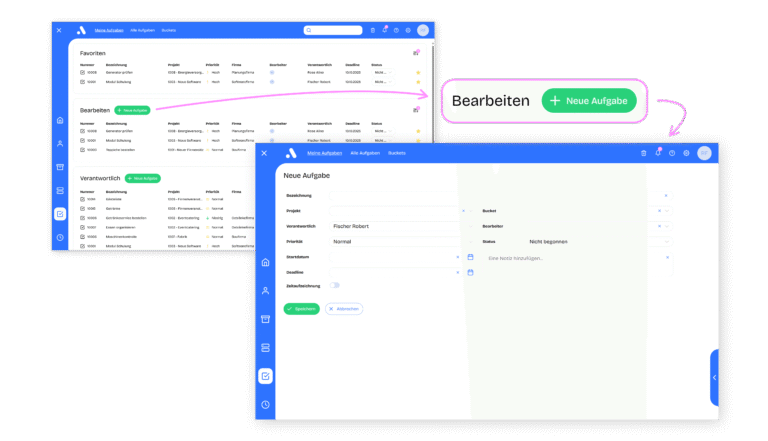
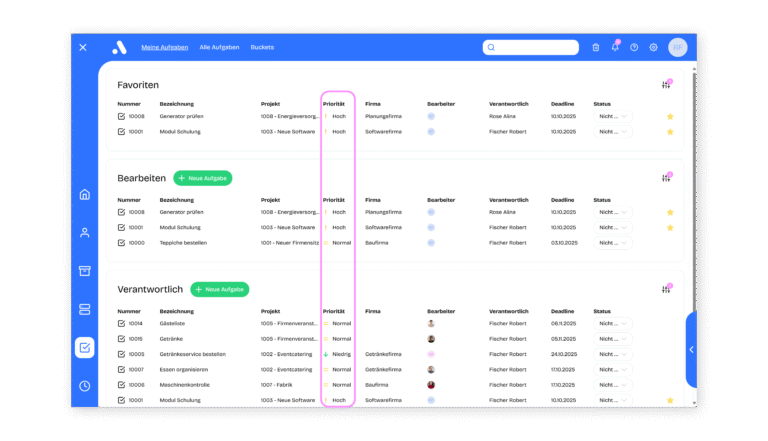
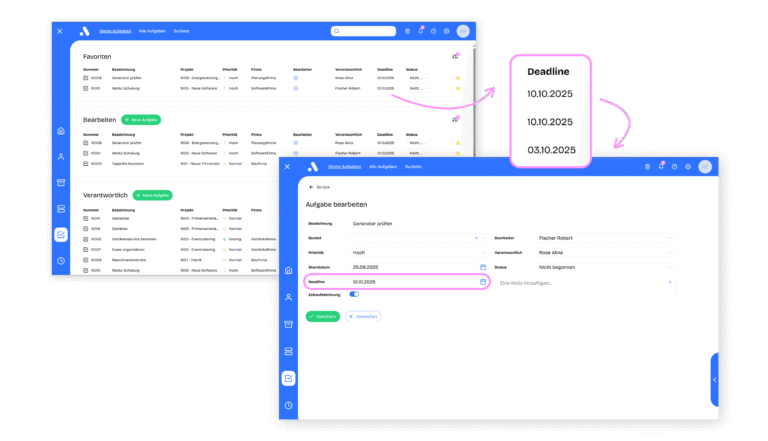
Bearbeite deine Aufgaben smart und weise ihnen Prioritäten oder Deadlines zuAufgabenplanung
Bearbeite deine Aufgaben smart und weise ihnen Prioritäten oder Deadlines zuLearn moreClaims management
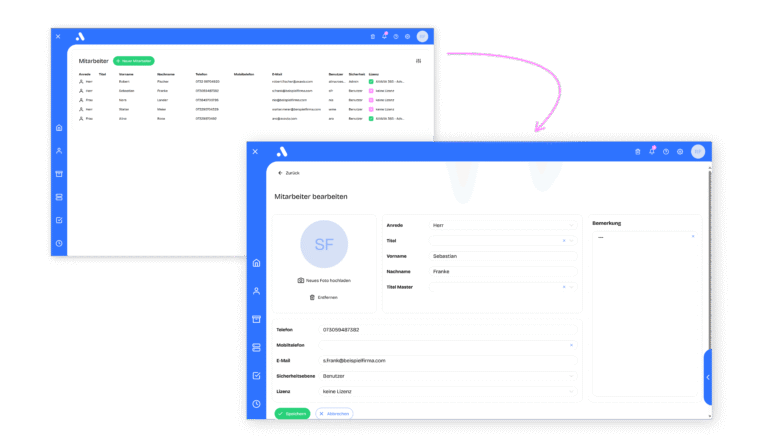
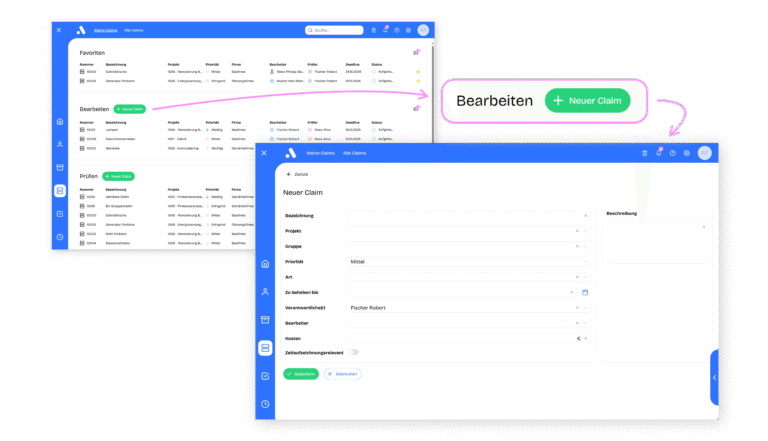
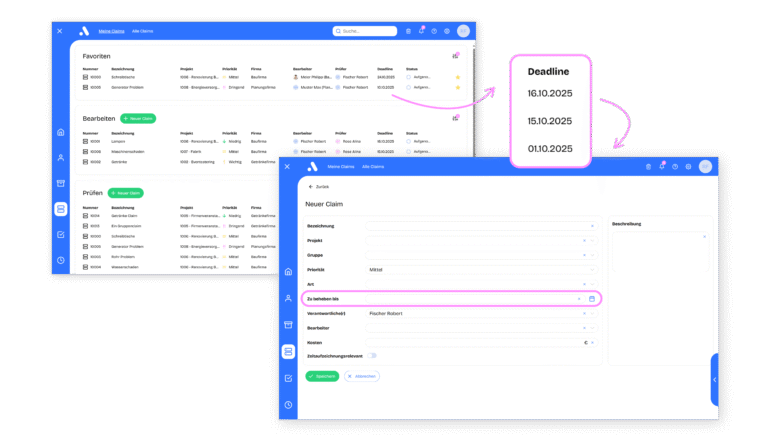
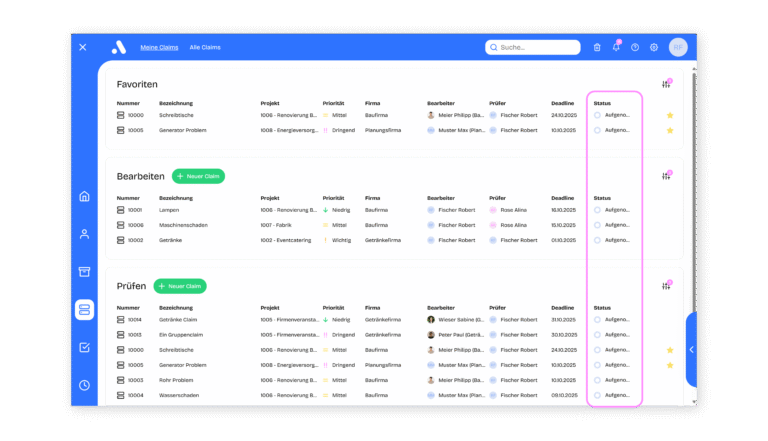
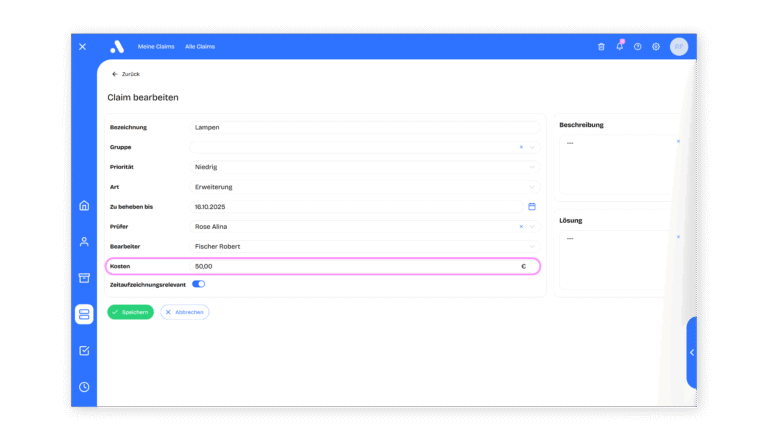
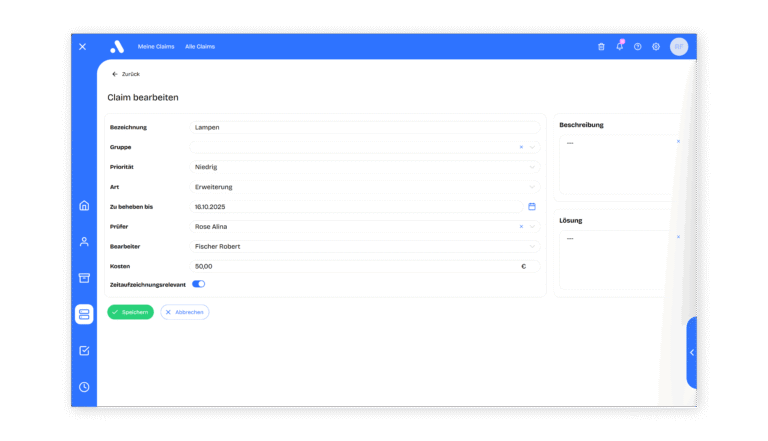
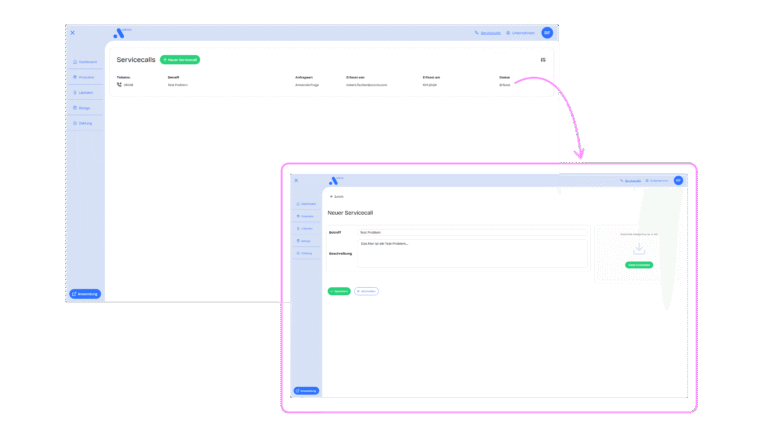
Behalte stets den Überblick über Nachforderungen und ReklamationenClaims management
Behalte stets den Überblick über Nachforderungen und ReklamationenLearn moreProjektzeiterfassung
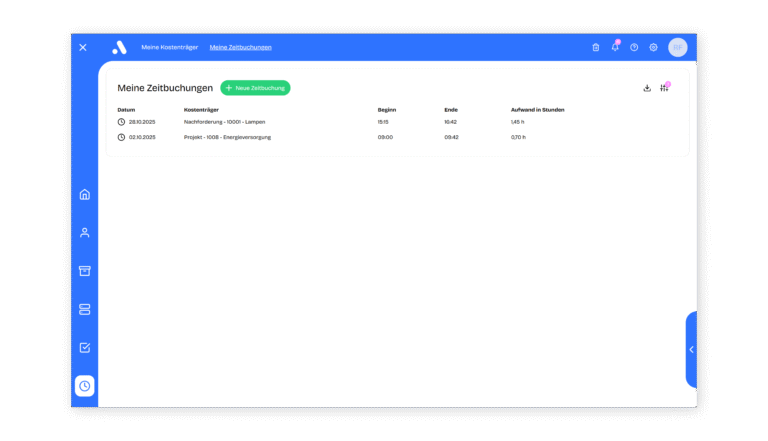
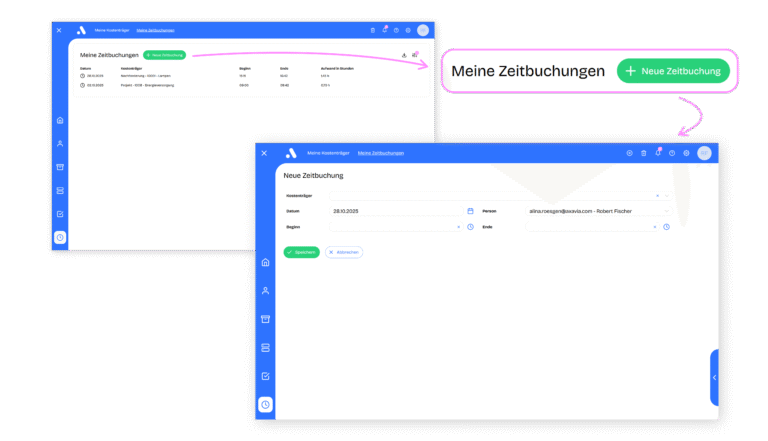
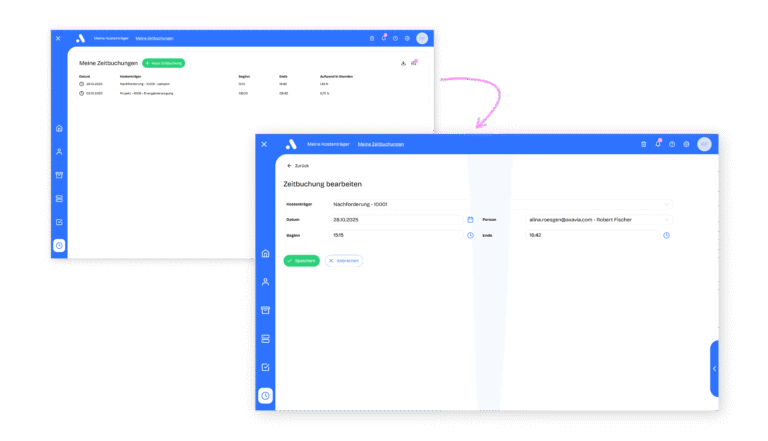
Erfasse deine Projektzeiten ganz easy mit Start und StoppProjektzeiterfassung
Erfasse deine Projektzeiten ganz easy mit Start und StoppLearn more - Warum axavia 365?
- Prices
- Help
- Functions
Allgemeine Features
Nutze das Dashboard, Collaboration Features oder BenachrichtigungenAllgemeine Features
Nutze das Dashboard, Collaboration Features oder BenachrichtigungenLearn moreAddress management
Keep track of all your business partners' contact detailsAddress management
Keep track of all your business partners' contact detailsLearn moreProject management
Manage deine Projekte effizient gemeinsam mit deinem ProjektteamProject management
Manage deine Projekte effizient gemeinsam mit deinem ProjektteamLearn moreAufgabenplanung
Bearbeite deine Aufgaben smart und weise ihnen Prioritäten oder Deadlines zuAufgabenplanung
Bearbeite deine Aufgaben smart und weise ihnen Prioritäten oder Deadlines zuLearn moreClaims management
Behalte stets den Überblick über Nachforderungen und ReklamationenClaims management
Behalte stets den Überblick über Nachforderungen und ReklamationenLearn moreProjektzeiterfassung
Erfasse deine Projektzeiten ganz easy mit Start und StoppProjektzeiterfassung
Erfasse deine Projektzeiten ganz easy mit Start und StoppLearn more - Warum axavia 365?
- Prices
- Help